What Is a Camera Stabilizer Plate and How Does It Work?

A Camera Stabilizer Plate is the small but important link between a camera and a stabilizing support. It may attach to a handheld stabilizer, gimbal, tripod, or camera cage. Though it looks like a simple strip of metal, its shape, screw positions, and locking features affect how securely the camera sits.

On many gimbals, the plate slides along a track, letting you move the camera forward, backward, or sideways. This adjustment helps align the camera’s center of gravity with the gimbal’s axes. A better balance can reduce motor strain and help the system respond smoothly during a pan or a walking shot. The plate does not stabilize footage by itself. It gives the stabilizer a better starting point.

Small details matter. Check the plate’s screw size, length, anti-twist pins, and compatibility with your camera or support. A plate that seems to fit may still block a battery door or leave a cable pressed against the body. The naming can be confusing, too; brands do not always use terms consistently. Easy to miss. Before filming, tighten the camera, check for movement, and rebalance after changing a lens or accessory. That takes a little patience. It is not glamorous, but skipping the check can turn a steady setup into a frustrating one. This guide explains what the plate does, how its adjustments work, and what to consider when choosing and using one.
What Is a Camera Stabilizer Plate and How Does It Work?

Definition and Purpose of a Camera Stabilizer Plate

A camera stabilizer plate is the mounting piece that connects a camera to a handheld or motorized stabilizer. It usually attaches to the camera’s tripod socket with a screw, then locks into a matching clamp or rail. The plate is not the stabilizer itself. It provides a secure, adjustable interface between the camera and the support system.

Its purpose is to hold the camera in a repeatable position and help distribute its weight across the stabilizer. Many plates have slots or sliding tracks, allowing the camera to move forward or backward during balancing. This adjustment matters: a camera that sits too far forward may strain the motors or tilt when released. Small changes can make a visible difference.

A plate also makes camera changes quicker. You can release the camera from the stabilizer without removing every accessory or rebuilding the setup. Check that the screw is snug and the plate is fully locked before moving. A loose fit can cause shifting, even when the camera looks level. In practice, this small part can be fiddly. I have found that rushing the balance check is tempting, but it often means doing it again.
What Is a Camera Stabilizer Plate and How Does It Work?

A camera stabilizer plate attaches a camera to a support system, such as a tripod or stabilizer. Its mounting screws help secure and position the camera; the plate itself does not electronically stabilize footage. This chart compares two common camera-mounting thread sizes. Values are nominal diameters converted from inches to millimeters.

Main Parts and Their Functions

What Is a Camera Stabilizer Plate and How Does It Work?
Main Parts and Their Functions

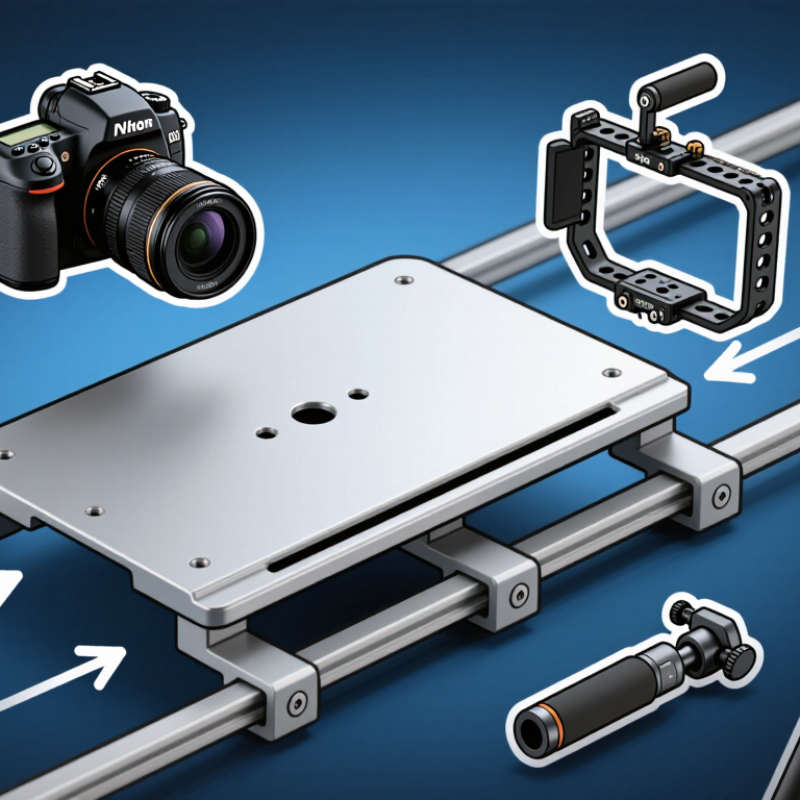
A camera stabilizer plate connects the camera to a handheld stabilizer, tripod, or support rig. Its base plate provides a flat mounting surface, while a sliding quick-release plate attaches to the camera’s threaded socket. A locking clamp holds the two pieces together. Some designs also include safety stops, alignment marks, or a small bubble level. These details help prevent accidental sliding and make setup easier.

The plate’s position affects balance. Move the camera forward or backward until its center of gravity sits close to the stabilizer’s support point. Then tighten the clamp and check that the camera does not shift when gently tilted. A plate cannot correct every balance problem; a heavy lens or loose accessory may still pull the rig off-center. I would recheck the fit after changing lenses. It is easy to overlook a small shift.

Tips: Tighten screws firmly, but do not force them. Check the lock before lifting the rig, and keep fingers clear of sliding rails. A quick test can catch a loose plate.

What Is a Camera Stabilizer Plate and How Does It Work? — Main Parts and Their Functions

Part What It Is Main Function How It Works Practical Note
Camera plate A flat mounting surface that attaches directly to the camera or its cage. Provides a secure interface between the camera and the stabilizer. A screw or compatible locking mechanism fastens the camera to the plate, helping keep it from shifting during movement. Use a plate that fits the camera’s mounting points and does not obstruct its battery door or ports.
Sliding or dovetail plate A plate designed to slide into a matching receiver on the stabilizer. Allows the camera position to be adjusted for balance and then locked in place. Sliding the plate forward or backward changes the camera’s position relative to the support system. Confirm that the plate is fully seated and the locking lever or knob is tightened before filming.
Mounting screw A threaded fastener, commonly using a 1/4-inch or 3/8-inch camera mounting thread. Attaches the camera, cage, or accessory to the plate. The screw clamps the mounted item against the plate to reduce movement between the surfaces. Tighten securely by hand or with the intended tool; excessive force can damage threads or equipment.
Anti-twist pins or locating points Small pins or raised features that engage compatible holes or surfaces on a camera cage. Help prevent the camera or cage from rotating around the mounting screw. When engaged, they provide extra resistance to twisting forces during operation. These features only work when they align with compatible holes or recesses.
Locking mechanism A lever, knob, clamp, or latch that secures the plate in its receiver. Keeps the plate and camera from sliding or lifting out unintentionally. The lock applies pressure to the plate or engages a catch once the camera is positioned. Check that the lock is engaged before lifting or moving the stabilizer.
Balance-adjustment track A slot or rail that permits controlled fore-and-aft or side-to-side adjustment. Helps position the camera’s center of mass over the stabilizer’s support point. Small plate movements alter the load distribution, reducing unwanted tilt or strain on the stabilizer. Make small adjustments, then recheck balance with the camera fully rigged.
Accessory mounting points Additional threaded holes or attachment features on some plates. Provide mounting positions for compatible accessories such as a camera cage or support arm. Accessories attach to the plate through matching threads or fittings, adding support or rigging options. Keep accessory weight within the stabilizer’s payload limit and avoid blocking the plate lock.
Stabilizer receiver The matching clamp or platform on the stabilizer that accepts the plate. Connects the camera plate to the rest of the stabilizing system. The receiver guides the plate into position and holds it once the locking mechanism is secured. Keep the contact surfaces clean so debris does not interfere with seating or locking.

How the Plate Balances and Secures a Camera

A camera stabilizer plate connects the camera to a stabilizer and lets you adjust its position. On a handheld gimbal, sliding the plate forward or backward helps balance the camera over its tilt axis. Some setups also allow side-to-side adjustment. A balanced camera stays level more easily and puts less strain on the stabilizer’s motors. The plate does not stabilize the image by itself. It provides the adjustable, secure connection that helps the stabilizer do its job.

To mount the camera, align the plate’s screw with the camera’s tripod socket and tighten it firmly. Then seat the plate in the clamp and close the locking mechanism. Small details matter: a plate that is not fully locked can shift during movement. After mounting, tilt the camera gently in several directions. If it drops or swings sharply, adjust the plate position and check the other balance axes. The exact process varies by stabilizer, so follow its instructions. It can take a few tries; that is normal.

Tips: Remove loose accessories before balancing, and check that the battery and lens are installed. Marking a plate’s working position can save setup time later. Still, recheck the balance after changing lenses. A few millimeters can make a noticeable difference.

Common Plate Types and Mounting Systems

A camera stabilizer plate is the rigid link between a camera and its support. Flat quick-release plates suit compact rigs and slide into a matching clamp. Dovetail plates offer a longer contact surface, giving operators room to balance a camera forward or backward. The naming is messy. Some systems look similar but do not lock together.

Broadcast-style wedge plates use tapered edges that seat firmly in a compatible receiver. They are useful on larger rigs, where a loose fit can let the camera shift during a pan. Mounting often relies on a 1/4-20 or 3/8-16 screw. ISO 1222:2010 specifies these common tripod connection sizes. A screw alone may not prevent rotation, so plates may also use locating pins, shoulders, or multiple attachment points.

Before a shoot, check that the plate sits flat and the clamp closes fully. For a heavier setup, test the complete rig at low height before lifting it onto a shoulder or tripod. Even a correctly sized screw can loosen under vibration. Fit is not proof of safety. I would still recheck the clamp after changing lenses or moving accessories; small shifts can upset balance.

How to Attach and Adjust a Stabilizer Plate

Before attaching a stabilizer plate, check that its screw fits the camera’s tripod socket. Set the camera on a clean surface, then align the plate so it does not cover a battery door or cable port. A small rubber pad can help prevent twisting. Tighten the screw with the plate’s built-in tool or a suitable coin, but stop when it feels secure. Keep it snug, not forced.

Slide the plate into the stabilizer’s mounting clamp and engage the lock. If the camera tilts forward or backward, loosen the clamp slightly and shift the plate along its slot. Make small adjustments; a few millimeters can change the balance. Check that the lens and accessories are in their normal shooting positions, since a heavier lens can move the center of gravity. Not quite level? Reposition and test again.

Once balanced, tighten the clamp and gently check for movement before filming. The camera should stay steady when the stabilizer is tilted, without the motors struggling or making unusual noise. If it still drifts, recheck the plate’s position and the camera’s weight distribution. This part can be fiddly, especially with compact cameras, and a perfectly centered plate is not always the best fit.