How to Choose the Best Camera Shoulder Backpack?
Choosing a Camera Shoulder Backpack is not just a question of capacity. It is about how quickly you can reach your camera, how comfortably the bag rests against your side, and whether its layout suits the way you actually shoot. Photographer Chase Jarvis’s well-known reminder, “The best camera is the one that’s with you,” captures a practical truth: a bag that stays at home cannot help you make a photograph. Yet a comfortable bag alone is not enough.
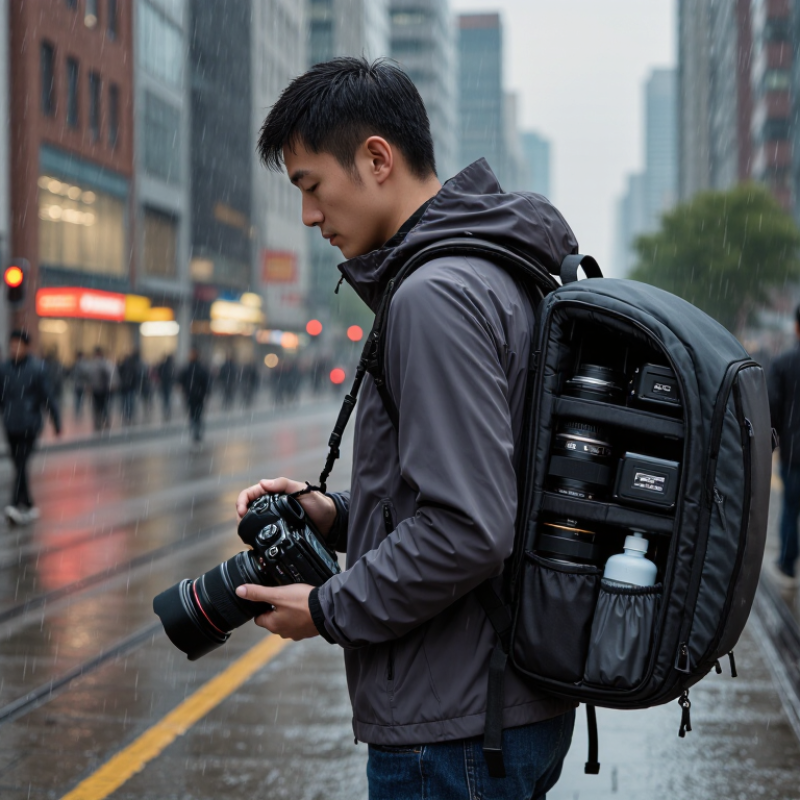
Picture a crowded street, a sudden shower, or a long walk with a camera body, two lenses, spare batteries, and a water bottle. A useful shoulder backpack should protect that gear, keep essentials easy to find, and avoid pulling painfully on one shoulder. Check the padding, zipper quality, weather protection, and fit against your own body. Test the bag with your real equipment if possible. It may feel roomy in a shop and cramped once a jacket or tablet goes inside.
The best choice depends on your routine. A travel photographer may value quick access and a stable harness; a casual user may prefer a lighter, simpler design. More pockets can help, but they can also slow you down. I still think this is easy to overlook. Compare capacity with comfort, then consider the conditions you face most often. This guide will help you weigh those details before choosing a Camera Shoulder Backpack.
Identify Your Camera Gear and Carrying Needs
Before choosing a camera shoulder backpack, lay your usual kit on a table. Include the camera body, largest lens, extra lenses, batteries, memory cards, and any filters you actually use. A compact camera and two small lenses need different space from a body with a long telephoto lens. Measure the longest item, too. That detail is easy to overlook. A padded compartment should hold your gear snugly without forcing you to stack delicate equipment awkwardly.
Think about how you move with the bag. For a short city walk, quick access to the camera may matter more than room for extra clothing. On a full-day hike, water, a light jacket, and balanced weight become just as important. Pack your regular load, then wear the bag for ten minutes. Notice whether the strap slips, presses on your neck, or makes the camera swing when you bend. Small discomforts grow. I once focused too much on storage volume and not enough on access; reaching a lens meant setting the bag down, which became tiresome.
Check whether the bag fits your actual routine, not an imagined one. If you carry a laptop, verify its sleeve dimensions separately from the camera compartment. If you often change lenses outdoors, look for a wide opening and dividers you can reposition. Leave a little room for growth, but avoid buying far more capacity than you need. Extra space can tempt you to carry gear you rarely use, and a heavy bag can make a good photo walk feel like work.
Check Compartment Fit and Equipment Capacity
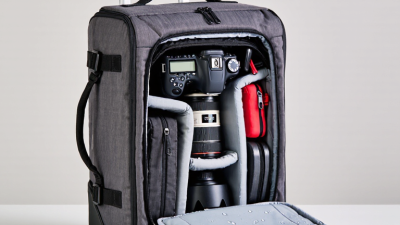
A camera shoulder backpack should fit your actual kit, not an imagined future setup. Measure your camera body with its longest lens attached, then compare those dimensions with the main compartment. Check the depth too; a padded divider can make a listed space feel surprisingly tight. Small detail, big difference. Adjustable dividers should hold gear snugly without pressing buttons or rubbing against a lens hood. Try placing the camera inside and lifting it out one-handed. If the opening catches on a strap or divider, access may feel frustrating during a quick change.
Capacity means more than the number of items a bag can hold. Pack your camera, two lenses, spare batteries, memory cards, and any everyday essentials you really carry. Leave some room. A little space helps prevent awkward packing and makes it easier to reach smaller items. Keep heavier equipment close to your back, where it tends to feel more balanced on your shoulder. Check that a water bottle or tablet does not push against the camera compartment. It is easy to underestimate how much room a jacket or charger needs. I still find that a bag packed neatly at home can feel cramped once I add one extra item, so test the full load before choosing.
How to Choose the Best Camera Shoulder Backpack? - Check Compartment Fit and Equipment Capacity
| Bag profile |
Typical capacity |
Example equipment fit |
Compartment checks |
Best suited for |
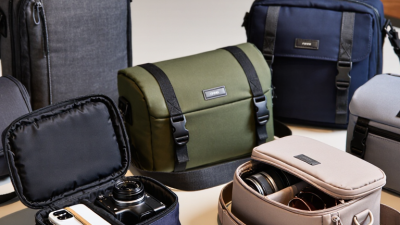
| Compact shoulder bag |
About 5–8 L |
One small mirrorless camera with a standard lens; space for a spare battery and memory cards |
Check the padded camera compartment’s internal length and height against the camera with its lens attached. |
Light outings and carrying a minimal kit |
| Everyday camera shoulder backpack |
About 10–18 L |
One camera body, two or three compact lenses, and small accessories |
Look for adjustable dividers, a separate accessory pocket, and room to remove the camera insert if needed. |
Daily photography and short trips |
| Standard DSLR or mirrorless backpack |
About 18–25 L |
One camera body, several lenses, a flash, batteries, and personal items |
Confirm that dividers can be repositioned and that the main compartment accommodates the longest lens you plan to carry. |
Enthusiasts carrying a versatile kit |
| Large professional kit backpack |
About 25–35 L |
One or two camera bodies, multiple lenses, and accessories; some layouts also fit a compact tripod |
Check the padded bay dimensions, the tripod attachment method, and whether access points remain usable when the bag is full. |
Long shoots and larger equipment kits |
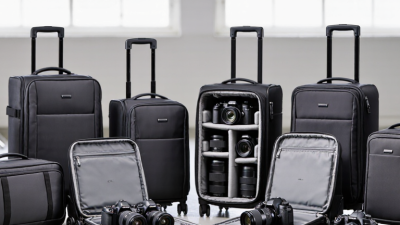
| Camera-and-travel backpack |
About 25–40 L |
A modest camera kit plus clothing or other travel essentials, depending on the divider layout |
Check whether the camera section is independently accessible and whether the bag’s exterior dimensions suit your travel needs. |
Travelers combining photography gear with personal items |
Capacity and equipment examples are approximate: layouts and usable space vary by bag. Compare the manufacturer’s internal compartment measurements with your actual camera, lens, and accessories before choosing.
Compare Strap Comfort, Access, and Weight Distribution
How to Choose the Best Camera Shoulder Backpack?
Compare Strap Comfort, Access, and Weight Distribution
A shoulder backpack should feel stable before it feels spacious. Load it with your usual camera, lens, and water bottle, then walk for ten minutes. Notice whether the strap cuts into your shoulder or slides toward your neck. Small discomfort grows on a long day. A wide, adjustable strap can help, but extra padding is not always better; bulky padding may trap heat or rub against a jacket.
Check access while wearing the bag. Can you swing it forward and reach your camera without setting it down? A side opening is useful only if your camera sits close to it and loose items do not block the zipper. Practice the motion at home. It may feel awkward at first, and that matters if you need to move carefully around other people.
Weight distribution is easy to overlook. Keep heavier gear near your back, and avoid packing every accessory “just in case.” I have to admit, a roomy bag can tempt me to carry more than I need. Walk with the loaded bag on both shoulders, then try its single-strap position. If it pulls your torso sideways or bounces when you turn, adjust the load or choose a smaller pack. A few minutes of testing can reveal more than an empty-bag fitting.
Assess Protection, Weather Resistance, and Build Quality
A shoulder backpack should keep a camera from shifting when you bend, climb stairs, or set it down. Press the base and side panels: they should resist a firm thumb without feeling brittle. Check that dividers hold a camera and lens snugly, with no metal zipper pulls touching equipment. A padded bottom matters. Drops happen.
Weather claims need specifics. IEC 60529 defines IPX4 as protection against water splashes and IPX7 as protection during temporary immersion up to one meter for 30 minutes under test conditions. These ratings do not guarantee that every seam or pocket stays dry. Look for test documentation, sealed zippers, covered seams, and a rain cover that fits without blocking access. ASTM D751 provides test methods for coated fabrics, including tear and water-resistance testing; ask which method and conditions were used. A water-resistant coating can wear down, so check care instructions too. It is easy to overtrust a smooth fabric surface.
Tips: Load the bag before buying. Walk with it for ten minutes, then check for strap slip, pressure points, and camera movement. A rain cover helps, but wind can make it awkward. I would still pack a dry cloth in an easy-to-reach pocket.
Balance Useful Features Against Your Budget
A shoulder backpack should protect your camera without making every outing feel like a gear haul.
CIPA’s 2023 annual camera shipment data recorded about 7.74 million digital cameras worldwide, up from 7.11 million in 2022. These figures track cameras, not bags, but they show that dedicated camera equipment remains part of a substantial market. Spend where protection matters: padded dividers should keep a camera body and lens from knocking together, while a rain cover can help during a sudden shower. Comfort matters. Test the loaded bag if possible. A strap that feels fine in a shop may dig into your shoulder after a long walk.
Set a ceiling before comparing extras. A tripod holder, laptop sleeve, and hidden pockets sound useful, yet each can add cost and bulk. Choose only features that match your routine: a commuter may value quick side access, while a landscape photographer may need room for a water bottle and spare layers. It is tempting to buy extra capacity; later, that space can become an excuse to carry unused gear. Skip the extras. Check the zipper, stitching, and divider fit, then compare those details across bags in your price range. There is no reliable industry-wide price that guarantees quality, so judge the materials and warranty rather than assuming a higher price means better protection.