Choosing the right Waterproof Rolling Camera Bag can protect expensive equipment during crowded shoots, long transfers, and sudden weather changes. A reliable bag should do more than resist rain. It must support camera bodies, lenses, batteries, memory cards, and fragile accessories without creating unnecessary movement.
After handling camera gear in airports, studios, and outdoor locations, practical details become impossible to ignore. Strong wheels matter on uneven sidewalks. A firm telescoping handle reduces strain when the case is fully loaded. Interior dividers should stay secure, even when the bag is tilted. Check the seals carefully.
Waterproof performance also requires honest evaluation. Some bags resist light rain but fail during prolonged exposure. Others offer excellent protection but become heavy and awkward. Material quality, zipper construction, stitching, and drainage design deserve close inspection. Manufacturer claims should be compared with independent reviews and real user experiences.
Small choices matter.
This guide explores seven useful tips for buying a Waterproof Rolling Camera Bag. It considers protection, capacity, mobility, comfort, security, and long-term value. Weight deserves special attention because a spacious bag can become difficult to lift. That trade-off is easy to underestimate. A bag may look professional yet perform poorly on stairs or rough ground.
There is no perfect option for every photographer. A wedding shooter, travel creator, and wildlife specialist may need very different layouts. The best decision comes from matching the bag to actual equipment and working conditions. Consider future upgrades, too. Buying only for today’s kit may lead to another expensive replacement. The recommendations ahead aim to make that choice more informed, realistic, and dependable.
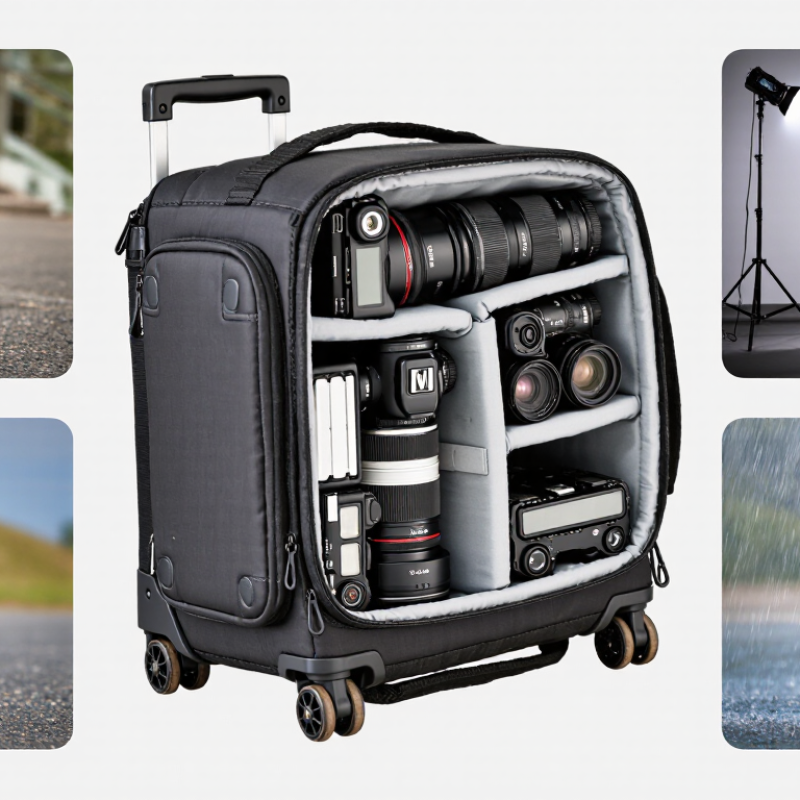
A waterproof rolling camera bag must protect equipment from more than rain. CIPA’s 2024 industry statistics recorded roughly 8.5 million digital-camera shipments worldwide, showing how much valuable gear travels outdoors. Start by checking the fabric. Look for coated nylon, welded seams, and a sealed base. Stitched seams alone can leak during a long downpour.
A secure closure matters more than a dramatic waterproof label. Choose a roll-top or weather-sealed zipper with a covered storm flap. IEC 60529 defines IP67 as dust-tight protection and temporary immersion up to one metre for 30 minutes. However, most camera bags are not officially IP-rated. Do not treat “waterproof” as proof. Ask for test details. I once trusted a tight zipper and found moisture around the corners after walking through wet grass. The mistake was mine.
Check the wheels, handle housing, and lid hinges carefully. These areas often create weak points. Select padded dividers that keep lenses from touching the outer shell. Add a removable dry liner for cables, batteries, and memory cards. A raised interior floor helps when the bag rests on puddled pavement. Review the stated water-resistance test, fabric coating rating, and repair policy. A high hydrostatic-head number sounds reassuring, but testing methods can differ. Leave space for a rain cover, too. Protection is rarely perfect.
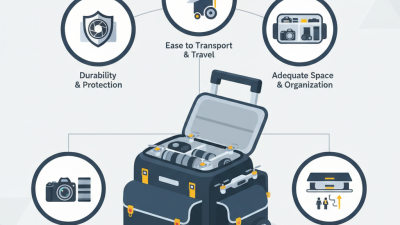
A waterproof rolling camera bag should fit your equipment collection, not merely look spacious online. Measure each camera body, lens, charger, battery, and support accessory before shopping. Include the largest lens hood and quick-release plate. They often need more room than expected.
I once chose a bag by its external dimensions and regretted it. Thick waterproof walls reduced the usable interior space. A better method is to compare internal measurements with your packed kit. Leave a small gap around each item for padded dividers and easy access. Tight compartments can damage controls when equipment is pulled out quickly. A bag that is too large creates another problem. Unused space allows gear to shift while rolling over uneven pavement.
Think about your next twelve months, too. If you may add one lens or a compact light, reserve limited expansion space. Do not buy a case twice your current needs. Extra capacity increases weight, bulk, and storage difficulty. Check the empty bag’s weight before judging its carrying ability. A fully loaded case can become uncomfortable on stairs, even with smooth wheels.
Waterproof protection also affects capacity. Sealed zippers and reinforced seams may reduce flexibility near the opening. Test whether the lid opens widely enough to reach the bottom compartment. I still sometimes overpack spare cables and forget the weight they add. Pack by shooting priority, then remove items you rarely touch. Your working kit should feel organized, not compressed.
When I test a waterproof rolling camera bag, I start with the wheels. They should roll smoothly over tile, pavement, and uneven airport floors. Small wheels often catch on cracks and gravel. Larger wheels usually handle rough ground better, but they may increase the bag’s size. Check whether each wheel spins freely without grinding sounds. A sealed wheel housing also helps reduce water and dust exposure, though no design stays perfect forever.
The handle deserves equal attention. Extend it fully and grip it with one hand. It should feel firm, not loose or shaky. A padded handle can reduce pressure during long walks. Look for several height settings, especially if different people will use the bag. The handle should not block the rear access panel or interfere with a tripod strapped outside. That small detail can become annoying quickly.
Travel comfort depends on balance, not just wheel quality. Pack a camera body, two lenses, batteries, and a rain cover before testing the bag. Pull it around a corner and lift it into a car trunk. It should track behind you without twisting. I once focused too much on waterproof fabric and ignored the narrow wheelbase. The bag tipped when fully loaded. That mistake reminded me to test real weight, not an empty case. A short trial in a crowded hallway can reveal more than a careful product description.
A waterproof rolling camera bag needs more than a sealed exterior. Its interior should control movement when wheels cross rough pavement. SITA’s 2023 Baggage IT Insights recorded 7.6 mishandled bags per 1,000 passengers in 2022. That figure makes internal protection worth testing, even for carry-on travel.
Look for dense, closed-cell padding around the base, corners, and lens zones. Soft foam feels comfortable, but it can compress under repeated impact. Dividers should stand upright and hold their shape. They must separate a camera body from a heavy lens, not merely create decorative compartments. Check whether the dividers attach securely after several adjustments. They may loosen. That is the part many buyers overlook.
Access design matters during a real shoot. A wide top opening helps you remove a camera without unpacking everything. A side or rear opening can protect equipment when the bag rests on a wet sidewalk. SITA’s 2024 Baggage IT Insights reported 6.9 mishandled bags per 1,000 passenger journeys in 2023, still above pre-pandemic levels. Test it loaded. Place a camera, two lenses, batteries, and a small cloth inside. Roll it, open it, and lift the camera with one hand. If the lid blocks your view, or the dividers collapse, the layout is not practical. A waterproof shell cannot fix poor access.
7 Tips for Buying a Waterproof Rolling Camera Bag
Durability starts with materials, not marketing language. Look for coated nylon, reinforced stitching, corrosion-resistant hardware, and sealed or protected zippers. An IP rating is more useful than the word “waterproof,” but it does not always cover seams or access panels. Test the handle for side-to-side movement and roll the bag over uneven pavement. Small weaknesses become expensive quickly. According to SITA’s 2023 Baggage IT Insights report, airlines mishandled 6.9 bags per 1,000 passengers in 2023. Camera protection deserves serious attention.
Security should be practical, not theatrical. Choose lockable zipper pulls, firm dividers, and an interior layout that prevents lenses from striking each other. A discreet identification panel helps recovery without displaying valuable equipment. Cost comparison should include replacement dividers, wheel repairs, weather covers, and the value of damaged gear. A cheaper bag may cost more after two wet assignments. Divide the purchase price by expected working years, then inspect warranty limits carefully. Materials matter. So does repairability. I still question whether every “all-weather” claim survives a sideways storm, because product testing rarely matches field use. Leave room for doubt.
| Tip | What to Compare | Recommended Specification | Durability and Weather Protection | Security Features | Typical Empty Weight | Typical Price Range | Value Assessment |
|---|---|---|---|---|---|---|---|
| 1. Choose a water-resistant outer material | Fabric type, denier rating, coating, and seam construction | 840D–1680D nylon or polyester with TPU/PVC coating and sealed or taped seams | Coated synthetic fabrics are lighter and flexible; coated seams and covered zippers are essential because untreated stitching can allow water entry. | Look for lockable zipper pulls and reinforced zipper garages; a material coating alone does not prevent theft. | Approximately 3–5 kg | Approximately US$180–$450 | Best balance for frequent travel and mixed weather |
| 2. Consider a hard-shell construction | Shell material, impact resistance, gasket, and hinge design | Molded polycarbonate or ABS shell with a continuous rubber gasket and corrosion-resistant hardware | Hard shells provide strong impact and splash protection, but cracked shells and damaged gaskets can compromise water resistance. | Integrated combination locks, lockable latches, and recessed hinges offer better protection than exposed zippers. | Approximately 4–7 kg | Approximately US$250–$650 | Best for maximum impact protection |
| 3. Check the closure and water-resistance level | Waterproof zipper, roll-top closure, gasket, and stated protection rating | A water-resistant zipper for rain; a gasketed or roll-top design for heavier exposure; verify any stated IP rating | “Water-resistant” usually means protection from rain and splashes, while “waterproof” requires a tested enclosure and protected seams. | Choose closures with two-way lockable pulls and avoid large exposed gaps around the zipper track. | Approximately 3–6 kg | Approximately US$200–$600 | Pay for tested closure protection, not marketing language |
| 4. Inspect wheels and the telescoping handle | Wheel diameter, bearing design, replaceability, handle flex, and mounting points | 60–80 mm wheels, sealed bearings, reinforced wheel housings, and a two-stage aluminum handle with minimal lateral movement | Larger wheels roll more easily over uneven pavement; protected bearings reduce contamination from dust and moisture. | A stable handle helps prevent accidental drops; reinforced attachment points reduce the risk of forced opening through structural failure. | Varies by shell and capacity | Replacement wheel sets typically cost US$20–$80 | A repairable wheel system can lower long-term cost |
| 5. Match the interior to your equipment | Padded dividers, shock absorption, capacity, and moisture management | Closed-cell foam or thick modular dividers, adjustable compartments, and a removable padded insert | Closed-cell foam absorbs little water and dries faster than open-cell foam; removable inserts make cleaning easier after wet travel. | A fitted interior prevents equipment from shifting and reduces accidental access when the bag is opened briefly. | Interior capacity commonly 25–45 L | Replacement divider kits typically cost US$25–$100 | Protective organization can prevent costly equipment damage |
| 6. Evaluate transport and airline practicality | External dimensions, carry-on compatibility, weight, and maneuverability | Check the packed dimensions against the airline’s current carry-on limits; keep total weight manageable when fully loaded | A compact design reduces stress on seams, wheels, and handles during transit, but smaller bags may sacrifice lens and accessory capacity. | Low-profile side panels and concealed pockets make external access more difficult in crowded areas. | Carry-on-style models commonly weigh 3–6 kg empty | Airline oversize or overweight fees vary by route and carrier | A lighter bag may save more than a low purchase price |
| 7. Compare total ownership cost | Purchase price, maintenance, repairs, accessories, and expected service life | Prefer replaceable wheels, repairable handles, washable liners, and a clear warranty covering manufacturing defects | Regularly clean salt, sand, and mud; dry the bag fully before storage; avoid storing wet equipment inside. | Budget for a cable lock or tracking device when transporting equipment in public spaces; these supplement, not replace, physical locks. | Expected service life often depends more on wheels, handles, and zippers than on fabric thickness | Typical total first-year budget: US$230–$750 | Best value means lower cost per year, not simply the lowest price |
| Buying note: Specifications and prices are typical market ranges for unbranded waterproof or highly water-resistant rolling camera bags. Actual performance depends on construction quality, maintenance, packing weight, and exposure conditions. | |||||||