What Is a Camera Slider Stand and How Does It Work?
A Camera Slider Stand is the support system beneath a camera slider. It keeps the rails level, stable, and ready for controlled movement. The slider carriage travels along these rails, carrying the camera from one position to another. That movement can be manual, motorized, or remotely controlled.
In practical use, the stand may include tripod legs, mounting plates, adjustable feet, or heavy-duty supports. These parts help reduce vibration on uneven floors, studio platforms, and outdoor locations. A well-balanced setup can create a slow side-to-side move, a reveal behind a subject, or a gentle push toward a product. Small details matter. Tighten every knob. Check the center of gravity. Watch the cable path.
Eric Kessler, founder of Kessler Crane and a motion-control equipment designer, explains the creative principle clearly: “Motion should serve the story, not distract from it.” This idea fits every Camera Slider Stand setup. A larger stand does not automatically create better footage. It may add weight, setup time, and unnecessary complexity. Sometimes, a simple two-tripod arrangement performs better than an expensive support frame.
Still, slider systems are not foolproof. Wind, loose connections, and poor leveling can ruin an otherwise careful shot. The camera may glide smoothly but still look lifeless. That is where judgment matters. This guide explains how a Camera Slider Stand works, which parts affect stability, and how to choose support for real filming conditions.
Definition and Main Components of a Camera Slider Stand
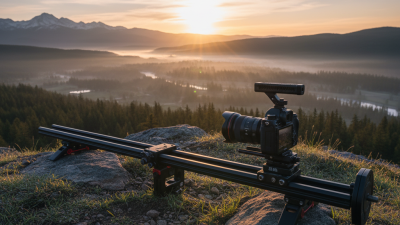
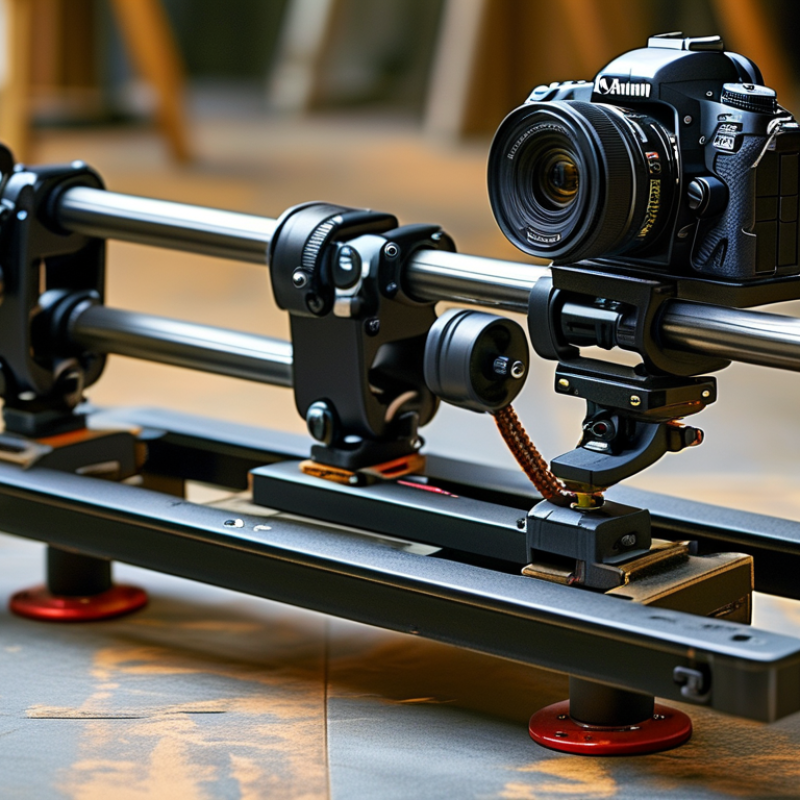
A camera slider stand is a support system that moves a camera smoothly along a fixed path. It combines a rigid rail, a sliding carriage, and stable support points. The carriage holds a mounting plate, while wheels or bearings guide its movement. Some models also include adjustable legs, leveling feet, end stops, and a locking brake. These parts reduce vibration and keep the camera aligned during a shot.
The operating principle is simple. The camera attaches to the plate, and the operator pushes the carriage across the rail. Weight transfers through the bearings into the rail and legs. A longer rail creates wider movement, but it also demands stronger support. CIPA’s 2024 camera shipment statistics recorded more than eight million digital-camera units worldwide, showing continued demand for controlled camera movement. Industry production surveys also report growing use of short-form video, where compact movement tools can improve visual quality. Still, a slider cannot fix poor balance. I have seen smooth rails produce shaky footage when one leg rested on an uneven floor.
Tips: Check every locking knob before recording. Keep the camera centered over the carriage. Use a slow, even push. For heavy setups, add a second support point. Test the move twice. Small errors become obvious on screen.
The main components work as one mechanical system. The rail provides direction, the carriage controls travel, and the mounting plate carries the camera. Support legs manage stability, while bearings affect noise and smoothness. Motorized versions add a belt, motor, and controller for repeatable movement. These systems offer precision, but manual operation often feels more natural. That judgment depends on the shot.
How a Camera Slider Stand Supports and Moves a Camera
What Is a Camera Slider Stand and How Does It Work?
A camera slider stand supports a camera while allowing controlled horizontal movement. It combines a stable base, sliding rails, a carriage, and a camera mount. The stand carries the equipment’s weight and reduces unwanted vibration during filming. A level setup matters because even a small tilt can make the camera drift or produce uneven movement.
The carriage travels along the rails using wheels, bearings, or a guided mechanism. As the operator pushes it, the camera moves smoothly from one point to another. This creates gentle tracking shots, product reveals, and cinematic side movements. The stand also helps maintain a consistent camera height and angle. In practical use, however, smooth motion depends on more than the slider itself. Uneven flooring, loose connections, or excessive camera weight can affect the result. I have found that slower movement often looks more professional, although it can feel too cautious in fast scenes.
Tips
Check the stand on a firm, level surface before mounting the camera. Tighten every connection, but avoid forcing the fittings. Balance the camera near the carriage center. Move it slowly by hand and watch for resistance. A short test recording can reveal tiny shakes that are difficult to notice directly. For heavier setups, use wider support and add stability beneath the feet. Do not assume a longer slider always creates a better shot. It may require more space and careful control. Practice helps, but reviewing imperfect footage helps more.
Key Types and Operating Mechanisms of Camera Slider Stands
What Is a Camera Slider Stand and How Does It Work?
A camera slider stand supports a sliding platform for controlled horizontal camera movement. It usually combines rails, a carriage, legs, and locking knobs. The carriage holds the camera while moving along the rails. Its movement can be manual, motorized, or driven by a belt system. A stable surface matters greatly. Even a strong slider may shake on uneven flooring.
A stable surface matters greatly. Even a strong slider may shake on uneven flooring.
Key Types and Operating Mechanisms of Camera Slider Stands
Rail sliders
use metal or carbon-fiber tubes to guide the carriage. Roller wheels or bearings reduce resistance during movement. They suit product shots, interviews, and slow cinematic transitions.
A tabletop slider
has short rails and compact support legs. It works well for close-up scenes, especially when space is limited.
A portable slider
often uses folding legs and adjustable feet. However, lightweight designs may transmit more vibration with heavier cameras.
Motorized sliders add a drive motor, belt, and electronic controller. The motor pulls the carriage at a selected speed. Some systems allow time-lapse moves or repeated travel paths.
Manual sliders depend on the operator’s hand pressure. This method feels natural but requires consistent control. I have found that small speed changes can become obvious on screen. A friction adjustment can help, though too much tension makes movement uneven.
Check the load rating, rail alignment, and tripod connection before filming. Do not trust the first smooth pass. Test both directions. A slight tilt can change the camera’s speed and framing.
How to Set Up and Use a Camera Slider Stand Step by Step
A camera slider stand supports a camera on a rail, allowing controlled horizontal movement. Its carriage usually rides on bearings, wheels, or a low-friction track. This movement creates smooth parallax, revealing foreground and background depth. Wyzowl’s 2024 State of Video Marketing survey reports that 91% of businesses use video marketing. Stable camera motion matters when audiences expect polished visual storytelling.
Place the stand on firm, level ground before attaching the camera. Extend each leg evenly, then check the bubble level from two directions. Lock every knob firmly. Do not rush this part. Mount the camera centrally, keeping the lens parallel to the rail. Add a counterweight when the camera feels front-heavy. Move the carriage slowly by hand and watch for cable tension. For a repeatable shot, mark the starting and ending points with tape. Record a short test clip. Review it at full speed, not only in slow motion. Small bumps often disappear during setup but become obvious later.
Wyzowl also reports that 73% of video marketers consider video effective for generating leads. A slider can support that goal by making demonstrations feel clearer and more deliberate. I sometimes over-tighten the locks, which can restrict movement. Check the carriage again. If the motion feels uneven, level the rail before changing camera settings. HubSpot’s 2024 State of Marketing report identifies short-form video as a leading high-return format, where clean movement can strengthen attention within limited runtime.
How a Camera Slider Stand Works
This chart shows camera position during a 20-second linear slide on a 100 cm rail. A constant travel speed of 5 cm per second produces smooth, predictable camera movement.
How to Set Up and Use a Camera Slider Stand
Place the slider stand on a stable, level surface and adjust its legs or supports until the rail is steady. Attach the camera to the carriage using a compatible mounting screw, then balance the camera near the center of the carriage. Move the carriage by hand to check for resistance before recording. During the shot, push the carriage at a consistent speed or use a motorized drive for repeatable movement. The chart represents a 100 cm travel distance completed in 20 seconds.
Factors to Consider When Choosing a Camera Slider Stand
What Is a Camera Slider Stand and How Does It Work?
A camera slider stand supports a rail or slider above the shooting surface. It keeps the camera stable during controlled horizontal movement. As the camera carriage travels along the rail, the stand helps reduce vibration and unwanted tilting. This creates smooth tracking shots, revealing details such as a product’s edge, texture, or changing background.
Factors to Consider When Choosing a Camera Slider Stand
Load capacity should match the camera, lens, fluid head, and accessories together. A stand rated too closely to the total weight may flex during movement. Stability matters more than impressive height. Look for wide feet, adjustable legs, and secure locking points. Rubber feet can help on smooth floors, while spiked feet may suit firm outdoor ground. Check the actual surface carefully.
Rail length also affects the choice. A longer slider needs stronger support, especially near its center. Uneven placement can cause sagging. I learned this the hard way. The shot looked smooth at both ends but shook in the middle. Portability matters on location, so consider folded size and setup time. Metal construction often improves durability, but it can increase carrying weight. Test the stand with your full camera setup before filming. Small adjustments can change the result. A reliable stand should remain steady while allowing quick repositioning.