360 Degree Camera Tripod Buying Tips for Perfect Shots?
When capturing panoramic views, a 360-Degree Camera Tripod is essential. It stabilizes your camera for that perfect shot. However, selecting the right tripod can be overwhelming. Many tripods claim to offer stability and versatility. But not all live up to the hype.
Consider the weight and portability of the tripod. A lightweight model is easier to carry but may lack stability. On the other hand, a heavier tripod offers better support but can be cumbersome. Ensure you find a balance that suits your needs. Look at the materials used in the tripod's construction. Cheap models may break easily during outdoor shoots.
Always reflect on your shooting style. Are you a traveler seeking portability? Or a studio photographer needing stability? Your choice should align with your goals. Ultimately, the right 360-Degree Camera Tripod enhances your photography experience. It helps you achieve breathtaking shots without unnecessary frustration.
Understanding the Basics of 360 Degree Cameras and Tripods
When exploring the world of 360-degree cameras, understanding their basics is crucial. These unique devices capture a panoramic view, offering a full spherical perspective. They are popular for creating immersive content and enhance storytelling. The lenses are often designed to cover a wide field, sometimes overlapping to ensure a seamless image. However, achieving the best results requires more than just the camera.
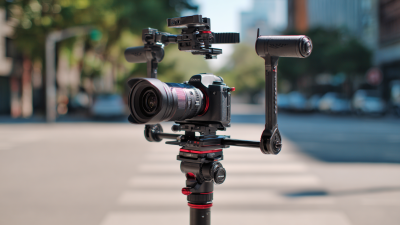
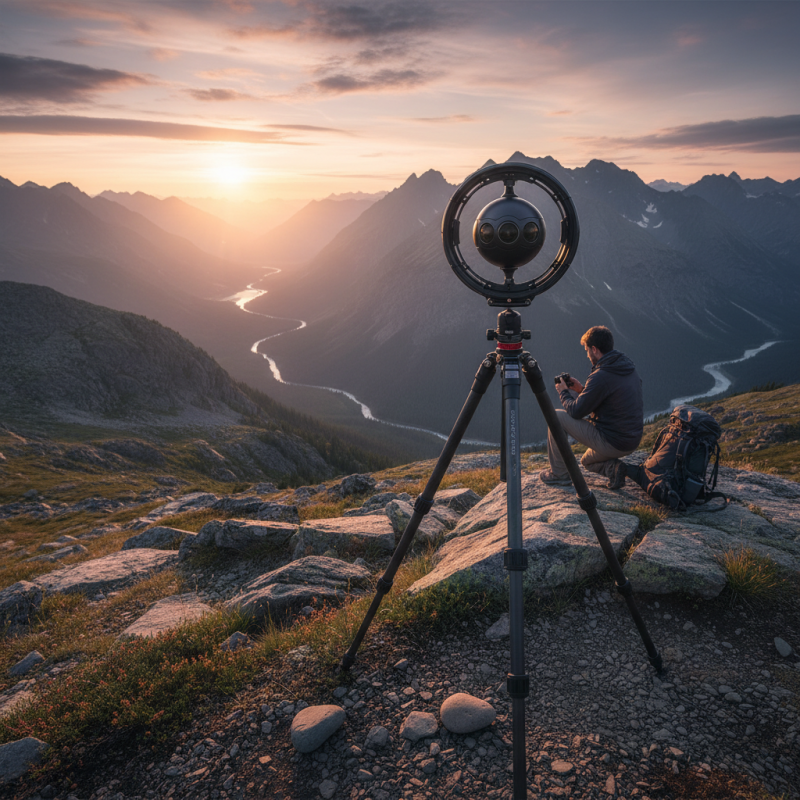
Tripods play a vital role in stabilizing these cameras. Stability is key for clear images and smooth footage. Consider a tripod that offers adjustable height and flexible angles. Some models allow for quick adjustments, which can be a game-changer. But remember, not every tripod suits every camera. Check compatibility to avoid frustration during shoots. Often, photographers overlook this detail, leading to shaky images.
Lighting is another aspect that can make or break your shots. Proper lighting enhances the details and colors in your imagery. Experiment with different settings and times of day. Reflect on your results. What worked? What didn’t? It’s a learning process. Don’t hesitate to make mistakes; they often lead to the best discoveries. In this evolving landscape, practice is essential. Embrace the journey of capturing stunning 360-degree content.
360 Degree Camera Tripod Stability Ratings
Key Features to Look for in a 360 Degree Camera Tripod
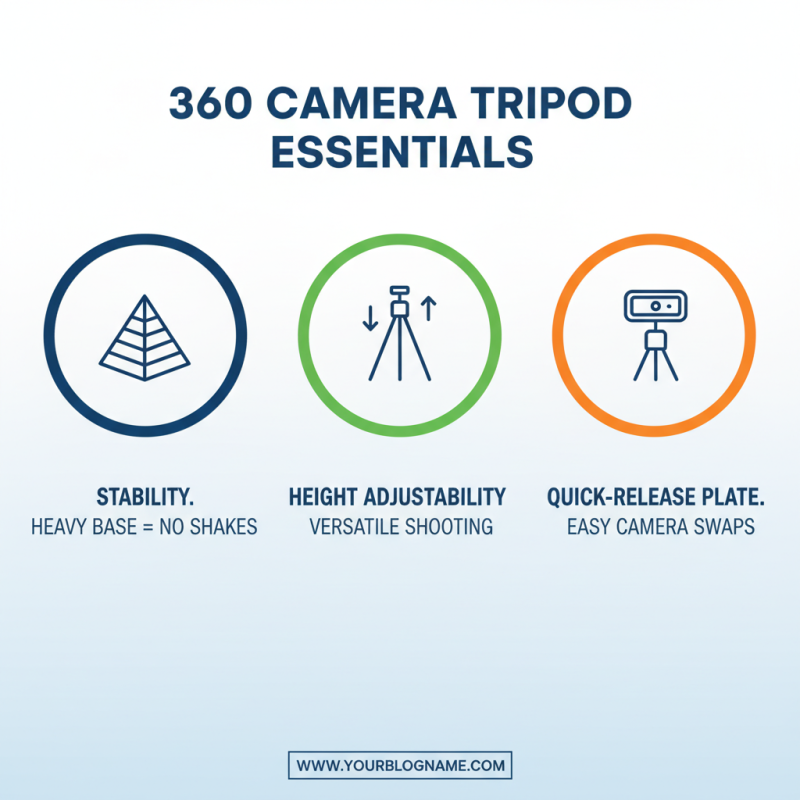
When searching for a 360-degree camera tripod, specific features are essential. Stability is crucial. A heavier base can help prevent unwanted shakes. Consider the height adjustability as well. A tripod that can extend to various heights provides flexibility in different shooting conditions. Look for quick-release plates, too. They facilitate swapping and adjusting cameras without hassle.
Durability matters as well. Choose materials that can withstand various weather conditions. Carbon fiber or aluminum are good options. Think about the leg locks. Twist locks can be smooth, but some may prefer flip locks for speed. Keep in mind how compact the tripod can be when folded. Sometimes, larger tripods can be cumbersome to carry.
Finally, reflect on your shooting style and needs. Will you often use the tripod in tight spaces? A smaller footprint may be beneficial. If low-angle shots are your focus, then a tripod with a reverse folding feature should be a priority. Many tripods have unique features that may not align with your needs, requiring careful consideration. Taking time to find the right one can make all the difference.
Material and Build Quality: Importance for Stability and Durability
When choosing a 360-degree camera tripod, material and build quality are critical. These factors directly influence stability and durability. A sturdy tripod can withstand various conditions, such as wind or uneven ground.
Lightweight materials may seem convenient but can compromise stability. Metal or high-quality plastic often provides better support. Look for features like rubberized feet for grip. A well-constructed tripod reduces vibrations, ensuring clearer shots. However, remember that not all sturdy tripods are easy to carry. Heavier models may be challenging for long hikes.
Pay attention to moving parts, too. Loose bolts can lead to wobbly shots. If a tripod setup feels unstable, reflect on the material choices. Are they worth the cost? It’s essential to balance weight and sturdiness. A perfect shot requires the right support.
Budget Considerations: Finding the Right Tripod for Your Needs
When considering a tripod for your 360-degree camera, budget is crucial. High-quality tripods range in price. Some affordable options can do the job quite well. However, cheaper models might lack stability. This is vital for capturing sharp, clear images. Spending a bit more can often yield better durability and functionality.
Think about what you need from a tripod. If you're shooting outdoors, consider weight and portability. A lightweight tripod is easier to carry. However, it might not hold up against strong winds. Heavy tripods provide better stability but can be cumbersome. Finding the perfect balance is essential.
Also, evaluate the features that matter to you. Adjustable legs and quick-release plates are helpful. Yet, if you’re on a tight budget, you may need to compromise. A buddy system can work well, too. Sharing a more expensive tripod with a friend could solve some issues. Remember, a perfect shot often depends on equipment and careful planning.
360 Degree Camera Tripod Buying Tips for Perfect Shots
| Feature |
Consideration |
Budget Range |
Recommended Use |
| Material |
Aluminum vs Carbon Fiber |
$50 - $200 |
Hiking, Travel |
| Weight Capacity |
Balance between stability and portability |
$70 - $300 |
DSLR, Video Cameras |
| Leg Sections |
More sections mean compactness |
$50 - $150 |
General Photography |
| Head Type |
Ball head vs Pan-tilt head |
$40 - $250 |
360 Degree Shots |
| Price |
Finding the right balance for your needs |
$30 - $500 |
Varied Usage based on budget |
Tips for Setting Up Your Tripod for Perfect 360 Degree Shots
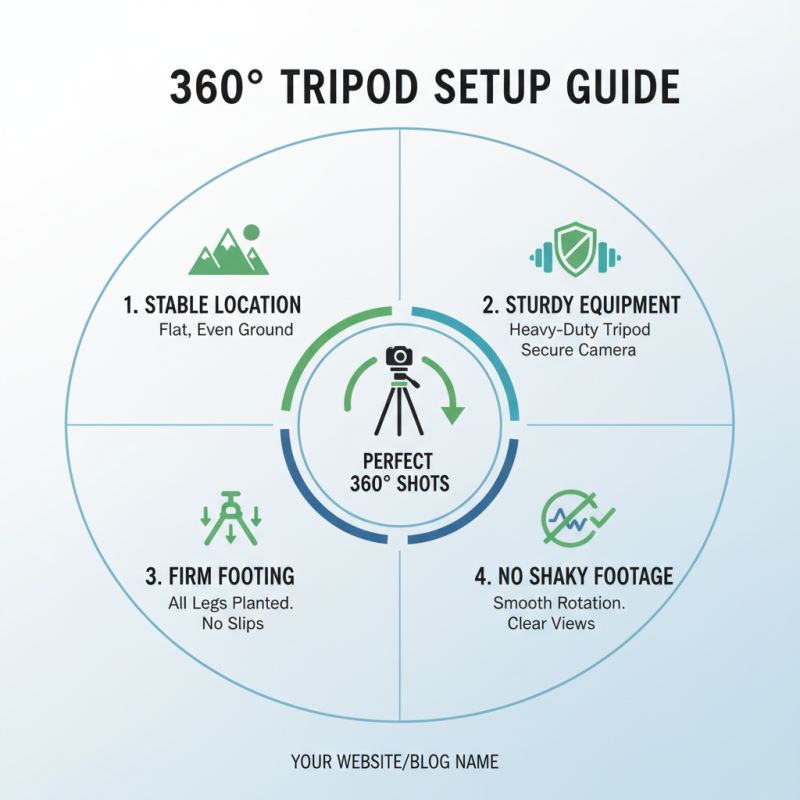
Setting up your tripod for perfect 360-degree shots is crucial. The right position can make a huge difference. First, find a stable location. Avoid uneven ground or surfaces. Use a sturdy tripod that can handle weight. Make sure all legs are firmly planted. This prevents shaky footage.
Adjust the height of your tripod. Eye-level shots can be stunning. However, try different angles for variety. A lower perspective might capture unique details. Keep the camera level throughout. An unsteady horizon can ruin your shot. Use a bubble level if necessary.
Always check your framing before shooting. Sometimes, the perfect view might be obstructed. Take a moment to adjust your angles. Sometimes, stepping back to review the scene helps. Don't rush this process. If things don’t seem right, reconsider your setup. Observing different perspectives can lead to surprising results.